

I recently worked on a custom module where one of the requirements was to use Font Awesome for custom forms and notifications / alerts.
Most of the people in the Magento community suggest to load Font Awesome via CDN, but this can cause ” blank squares ” and eventually slow down the front-end on slower connections.
|
1 2 3 4 5 6 |
<?xml version="1.0"?> <page xmlns:xsi="http://www.w3.org/2001/XMLSchema-instance" xsi:noNamespaceSchemaLocation="urn:magento:framework:View/Layout/etc/page_configuration.xsd"> <head> <css src="https://use.fontawesome.com/releases/v5.2.0/css/all.css" src_type="url"/> </head> </page> |
So instead using a CDN I decided to add those libraries in Magento which will be merged with the static view files. Here is how it works.
1. Copy files
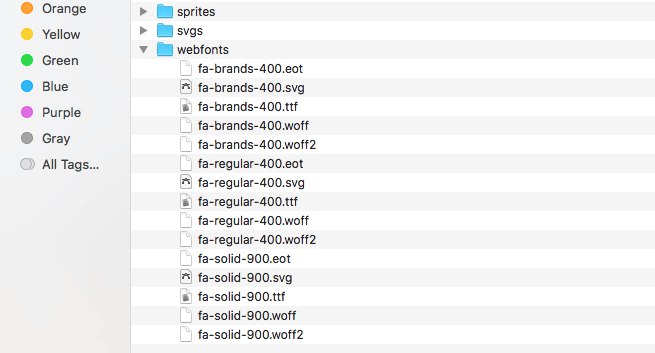
Go to Host Font Awesome Yourself and download the entire library. The zip file should contain css, js and less files as well as webfonts.

Copy all less files to the following folder.
|
1 |
[Namespace]/[YourModule]/view/frontend/web/css/fontawesome/ |
Next, copy all files from the webfonts folder to the below path.
|
1 |
[Namespace]/[YourModule]/view/frontend/web/css/webfonts/ |
Make sure you only copy the less files ( no CSS files ).
2. Update Layout XML
Don’t load the library globally if you only need it at one place. In my case, I added those library to my custom controller only. For example:
|
1 |
[Namespace]/[YourModule]/view/frontend/layout/namespace_yourmodule_controller_action.xml |
|
1 2 3 4 5 6 7 8 9 10 11 12 13 14 |
<?xml version="1.0"?> <page xmlns:xsi="http://www.w3.org/2001/XMLSchema-instance" xsi:noNamespaceSchemaLocation="urn:magento:framework:View/Layout/etc/page_configuration.xsd"> <head> <css src="Namespace_YourModule::css/fontawesome/fontawesome.css"/> <css src="Namespace_YourModule::css/fontawesome/regular.css"/> <css src="Namespace_YourModule::css/fontawesome/solid.css"/> <css src="Namespace_YourModule::css/style.css"/> </head> <body> <referenceContainer name="content"> ... </referenceContainer> </body> </page> |
3. Template
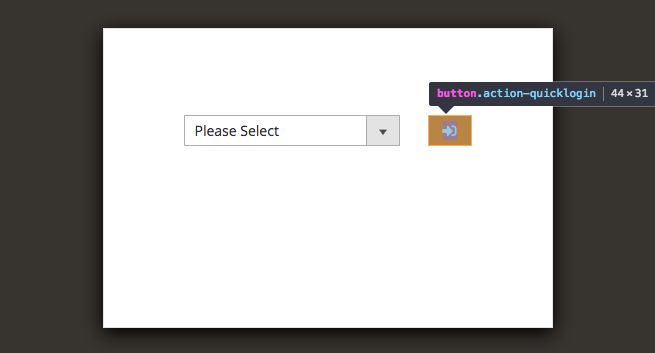
Once you have re-compiled your code, you should be able to use Front Awesome in your template. For example:
|
1 |
[Namespace]/[YourModule]/view/frontend/templates/form.phtml |
|
1 2 3 |
<button class="action-quicklogin"> <i class="fas fa-sign-in-alt"></i> </button> |
Btw. the same works for the adminhtml area in ./view/adminhtml/.