In this post, I am going to show you how to prevent a release from being deployed directly to production if it hasn’t been deployed to staging. Octopus has a great feature called ( Lifecycles ) that allows you to create advanced deployment workflows for any type of project.
This way you are able to force your team to follow a strict deployment process that will definitely improve your test routine and the way how you deploy code changes. No more untested code changes on production!
Okay, let’s start. Here is how you can create a custom Lifecycle.
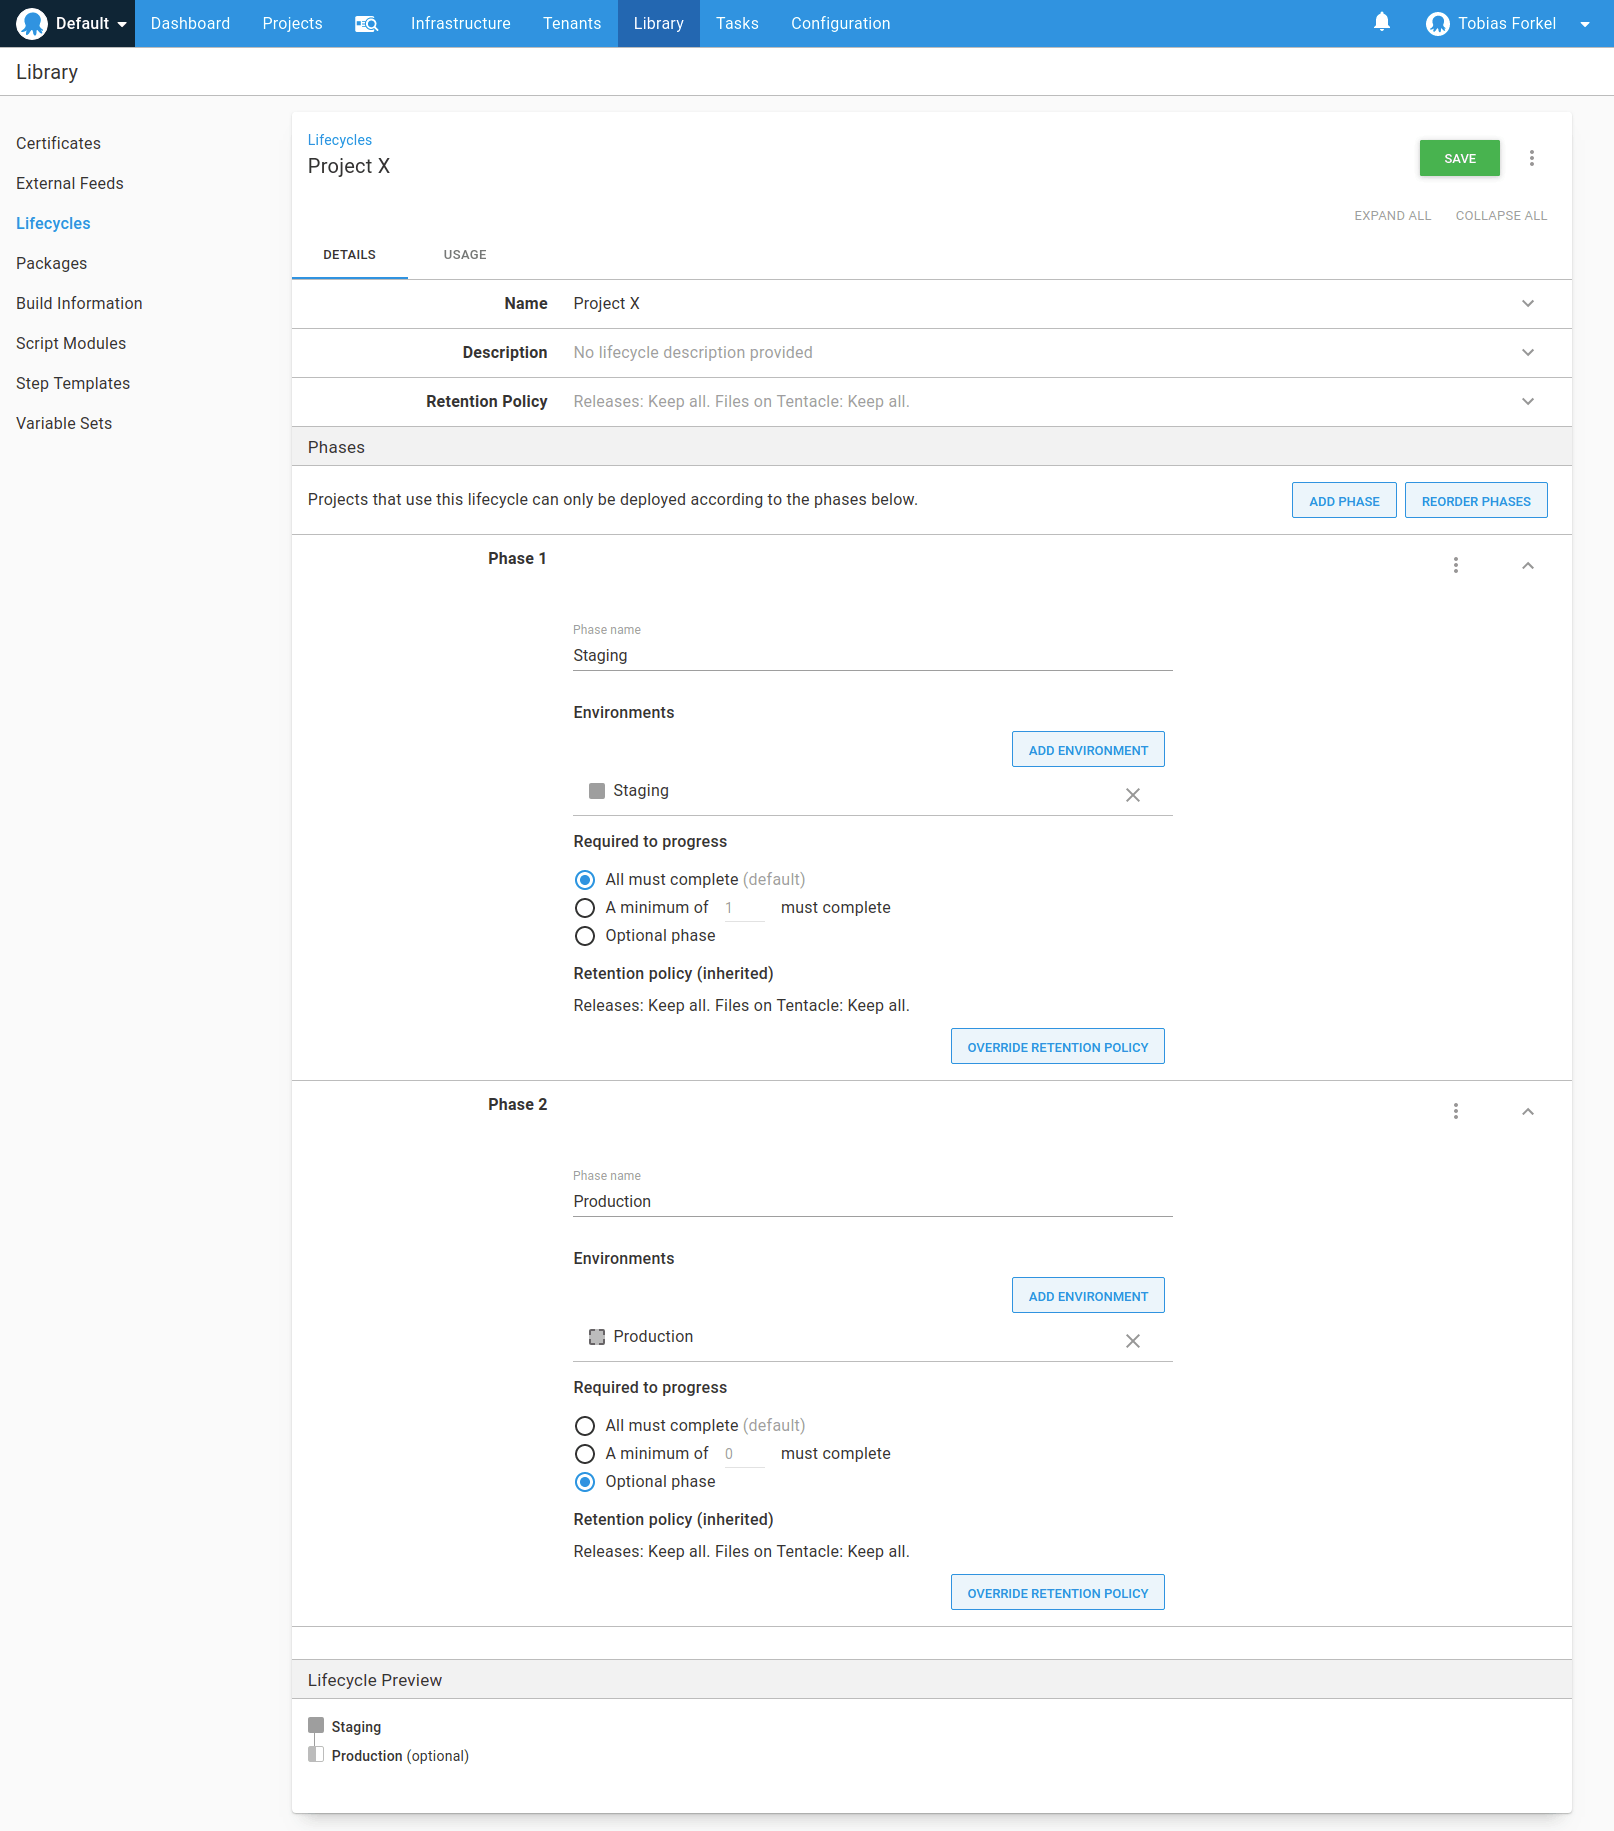
- From the Lifecycle page, click on the ADD LIFECYCLE button.
- Give the Lifecycle a name and add a description. For example ” Project X “.
- You can leave the Retention Policy unchanged ( Keep all ) for now.
Scroll down and continue with the next tab.
- Click ADD PHASE, to explicitly define the phases of the lifecycle.
- Give the phase a name. For example ” Staging ” because I want you deploy and review your changes on staging first.
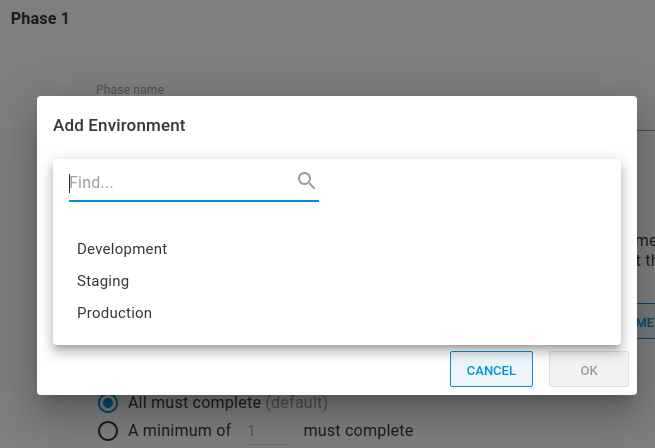
- Click ADD ENVIRONMENT to define which environments can be deployed to during this phase of the lifecycle. Choose your staging environment from the dropdown list.
If you haven’t add an environment yet, you must create at least two ( staging, production ). Learn more about Environments.
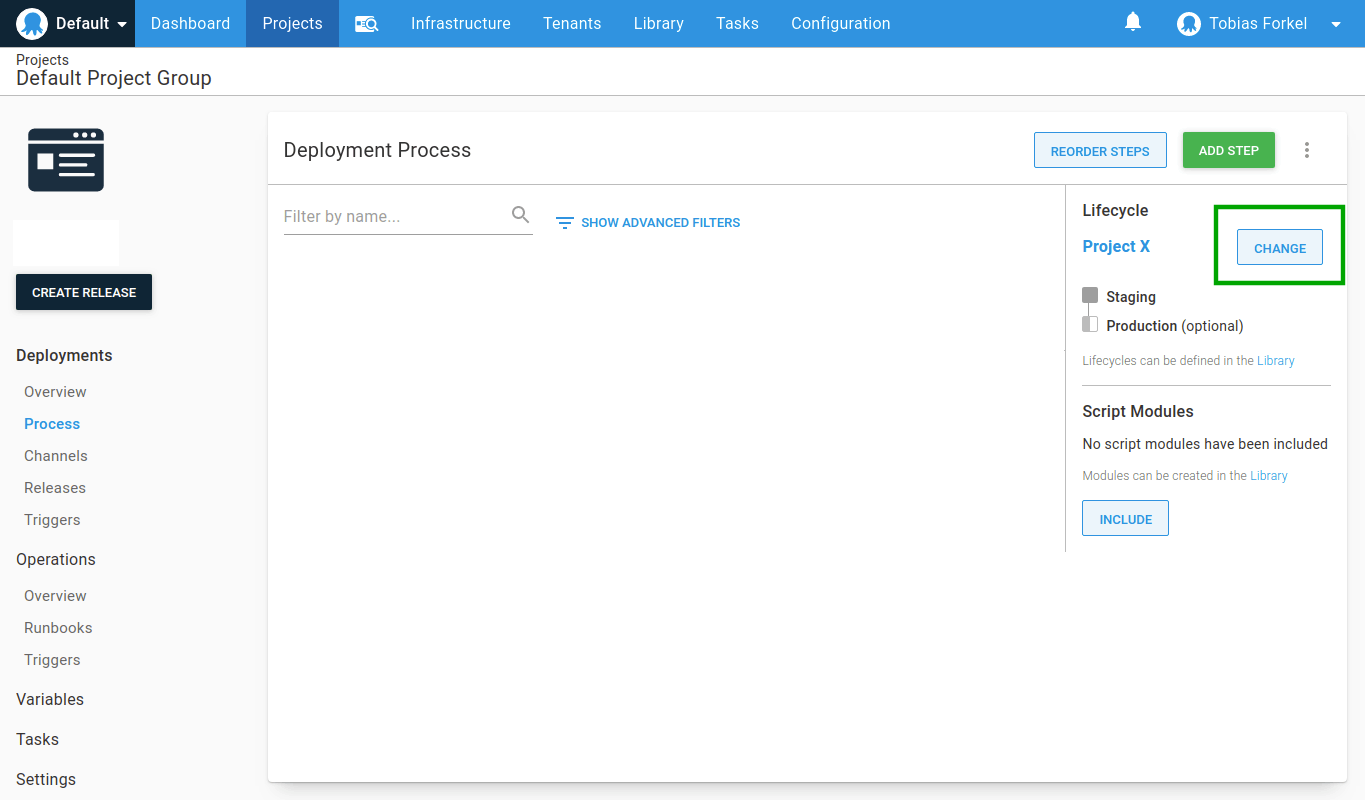
Scroll up again and save the new Lifecycle. Now go back to your project and click the link Process in the left sidebar. Next, hit the button Change on the right-hand side and select the Lifecycle that you’ve just created and save the changes.
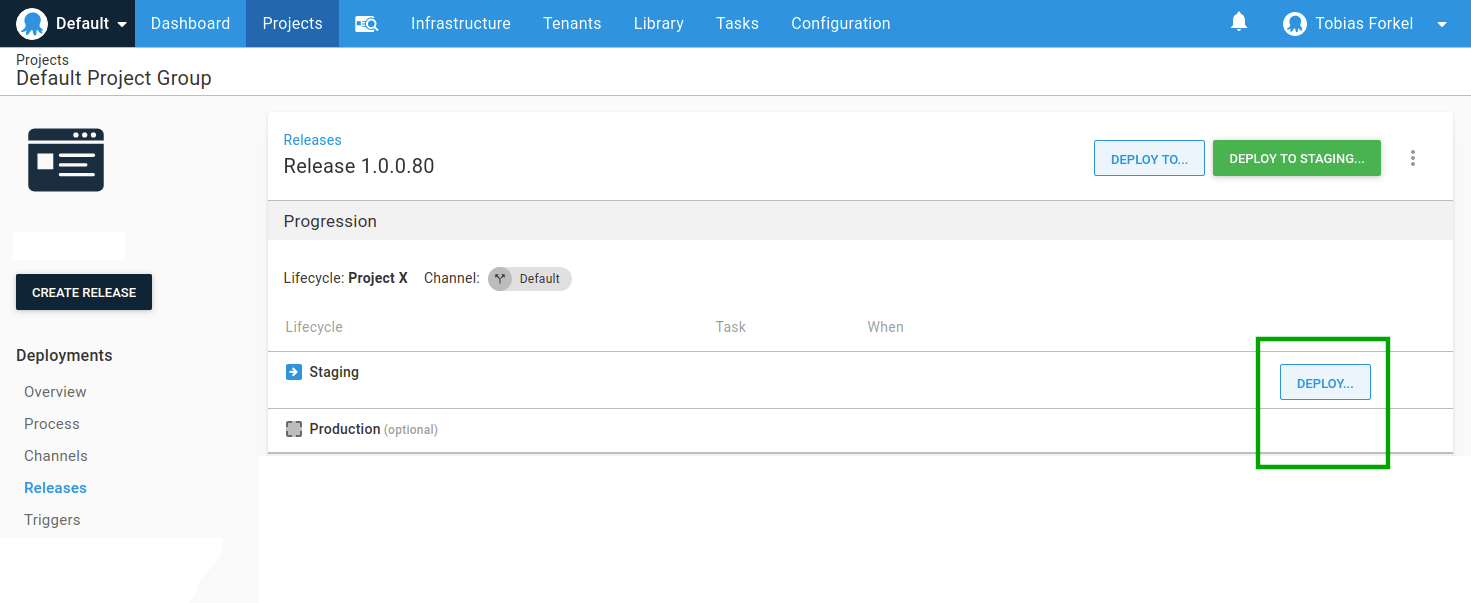
After that, try to deploy a new release. You will see that there is no option to deploy on production. Just must deploy your code successfully to your staging environment first in order to be able to push changes to production.
 This is just one of many examples of how you can improve your deployment routine with Octopus.

