Apply patches with composers post-install-cmd

magento2_teaser_patch

I just want to introduce another approach that will apply Magento patches, in case your Magento instance isn’t hosted on Adobe’s Cloud infrastructure or can’t be applied as explained in How to apply a composer patch provided by Adobe for some reason.

1. Update your composer.json file

Add a new section scripts” at the end of your composer.json file and validate your file with composer validate.

If you see ./composer.json is valid you are good to move on. Btw. your composer.lock file doesn’t need to be updated.

2. Create a folder ./patches/

Create a folder ./patches/ or something similar and copy your *.patch file in there.

3. Test it

Run composer install and wait. Your script and patch should be executed after Generating autoload files just like in the below output.

4. Deploy it

Commit your changes ( composer.json and ./patches/ ) folder and run your deployment procedure.

That’s it!

Magento 2.4.x, Elastic Search 7.9.1 on Alpine Linux 3.12, jdk/bin/java: No such file or directory

Magento2 Teaser

While setting up a new local test environment specifically for Magento 2.4.x with Elastic Search on Alpine Linux ( Docker ) I had some problems with getting elastic search up and running.

The first issue I had was related to a missing home path of JAVA. Because of that, I wasn’t able to start Elastic Search at all.

I’ve fixed it by setting the missing path for JAVA_HOME which I have added later to my profile settings. https://stackoverflow.com/questions/35325856/where-to-set-system-default-environment-variables-in-alpine-linux

The second issue was related to the JAVA version inside the docker container.

Alpine Linux has the required version in the repository, which made it easy to install the missing package with apk.

GCE – Open Up Port 8025 in VPC for MailHog

google_cloud_plattform

If you want to use MailHog ( https://github.com/mailhog/MailHog ) on your Google Compute Engines (GCE) you probably have to create a new VPC firewall rule in your project. In this post, I will skip the installation and configuration part of MailHog with Supervisord, because there are so many different ways to set up MailHog.

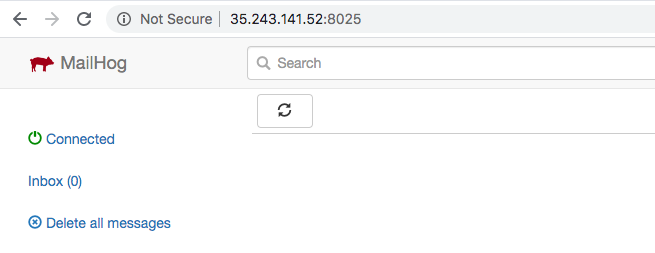
By default, the MailHog interface is running on port 8025.

Mailhog GUI interface

Once the MailHog process is up and running, you probably won’t be able to access your server on port 8025. This is because those ports are not defined in VPC. In order to get access from outside, you must create a new firewall rule in your GCE project. This can be done in the Google console or simply via the command-line. Here is how I created a new rule ” custom-allow-mailhog ” for port 8025.

Once the rule has been created, you should be able to open the interface of MailHog.

GCE – SSH Directly Into Your Docker Container

google_cloud_plattform

In this article, I am going to change the SSH port from 22 to 52241 and create a new firewall rule in VPC. Please do your own research and make sure you understand the impact, especially on a production environment.

When you deploy a new docker container on GCE, you can SSH into the host machine ( VM ). This is simply because the IP address is pointing to the host machine. But what about the docker container that runs on it? In this case, you must use docker exec or the gcloud command-line tool in order to get access to the container, which can be pretty time consuming over time.

I am working on a project where I need direct access to my alpine docker container on port 22 or any other port. As you can see in the below output, no ports are exposed for my container.

This is mainly because the docker container shares the network with the host. Source

Containerized VMs launch containers with the network set to host mode. A container shares the host network stack, and all interfaces from the host are available to the container.

This is very convenient because it allows you to access your docker container from pretty much any port. However, only a few ports are actually open and configured in the VPC Network > Firewall settings for security reasons. For the SSH connection I decided to open a custom port 52241. You can do this in your GCP Console under VPC Network > Firewall or with the following gcloud command-line tool.

Once completed, here is how the new firewall rule looks like in the console. If you scroll down, you will also see all affected instances.
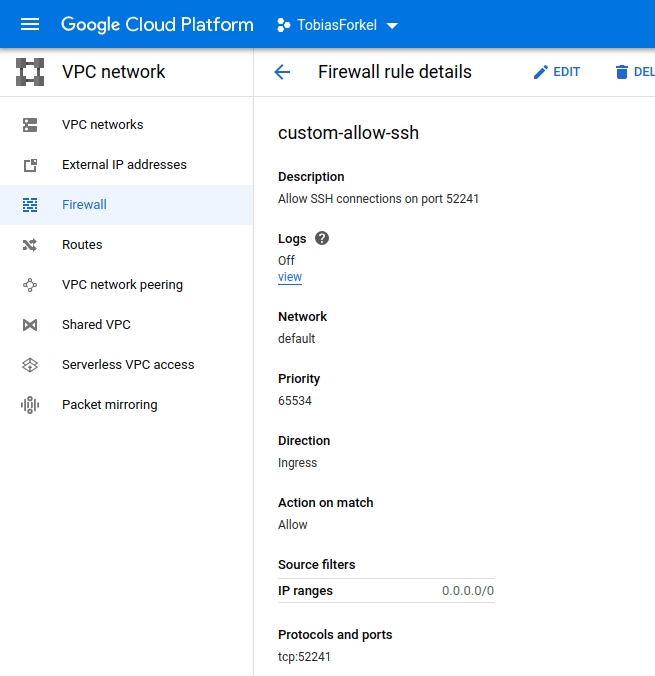
GCP Custom Firewall

Before you can SSH into your container on port 52241 you must change the port in the sshd configuration /etc/ssh/sshd_config within your container or container image. Not on the VM.

You may have to restart your ssh service before you can use the new port. Once this is done, you can SSH into your docker container.

AWS – ECS Keeps Recreating Docker Container

AWS ECS Logo

Today was a strange day. I’ve launched a new version of my docker image within an ECS cluster, which usually worked fine. However, today my container always got recreated every 5 minutes for no reason.

ecs_keeps_recreating_containers

The new docker image that I have pushed to the repository had no significant changes, except a redirect from non-SSL ( 80 ) to SSL ( 443 ) for all loaded virtual hosts. So, when I had a look at the processes, everything looked fine. There was nothing that could put the container into an unhealthy status.

Even the log output of the docker container didn’t show any error. After a little bit of research, I ended up on the following AWS developer guide page https://docs.aws.amazon.com/AmazonECS/latest/developerguide/update-service.html

It was not exactly what I was looking for, but it pretty much explained the problem I had. One of my colleagues said I should maybe have a look at the health checks of the load balancer.

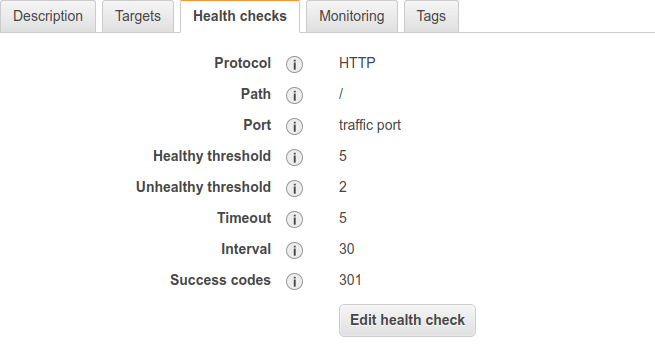
Indeed, when I had a look at the settings in EC2 > Load Balancing > Target Groups > Health Checks the health check expected a success code 200 instead of 301 on port 80. Because of that, the container has been marked unhealthy every 5 minutes.

aws_ec2_load_balancer_health_checks

I hope this will point someone in the right direction.

Octopus – Couldn’t find a valid ICU package installed on the system

Octopus Deploy

This morning I created a new ECS environment and tried to deploy a Laravel project on it.

So far so good, until one of the deployment steps got stuck in Octopus because of the following error.

While looking for a solution, I’ve noticed that I forgot to install the package libicu on the new ECS machine that was required during the deployment process.

After installing the missing package, I was able to deploy again without errors.

Octopus – Basic ” Staging First ” Lifecycle

Octopus Deploy

In this post, I am going to show you how to prevent a release from being deployed directly to production if it hasn’t been deployed to staging. Octopus has a great feature called ( Lifecycles ) that allows you to create advanced deployment workflows for any type of project.

Octopus Lifecycles Example

This way you are able to force your team to follow a strict deployment process that will definitely improve your test routine and the way how you deploy code changes. No more untested code changes on production!

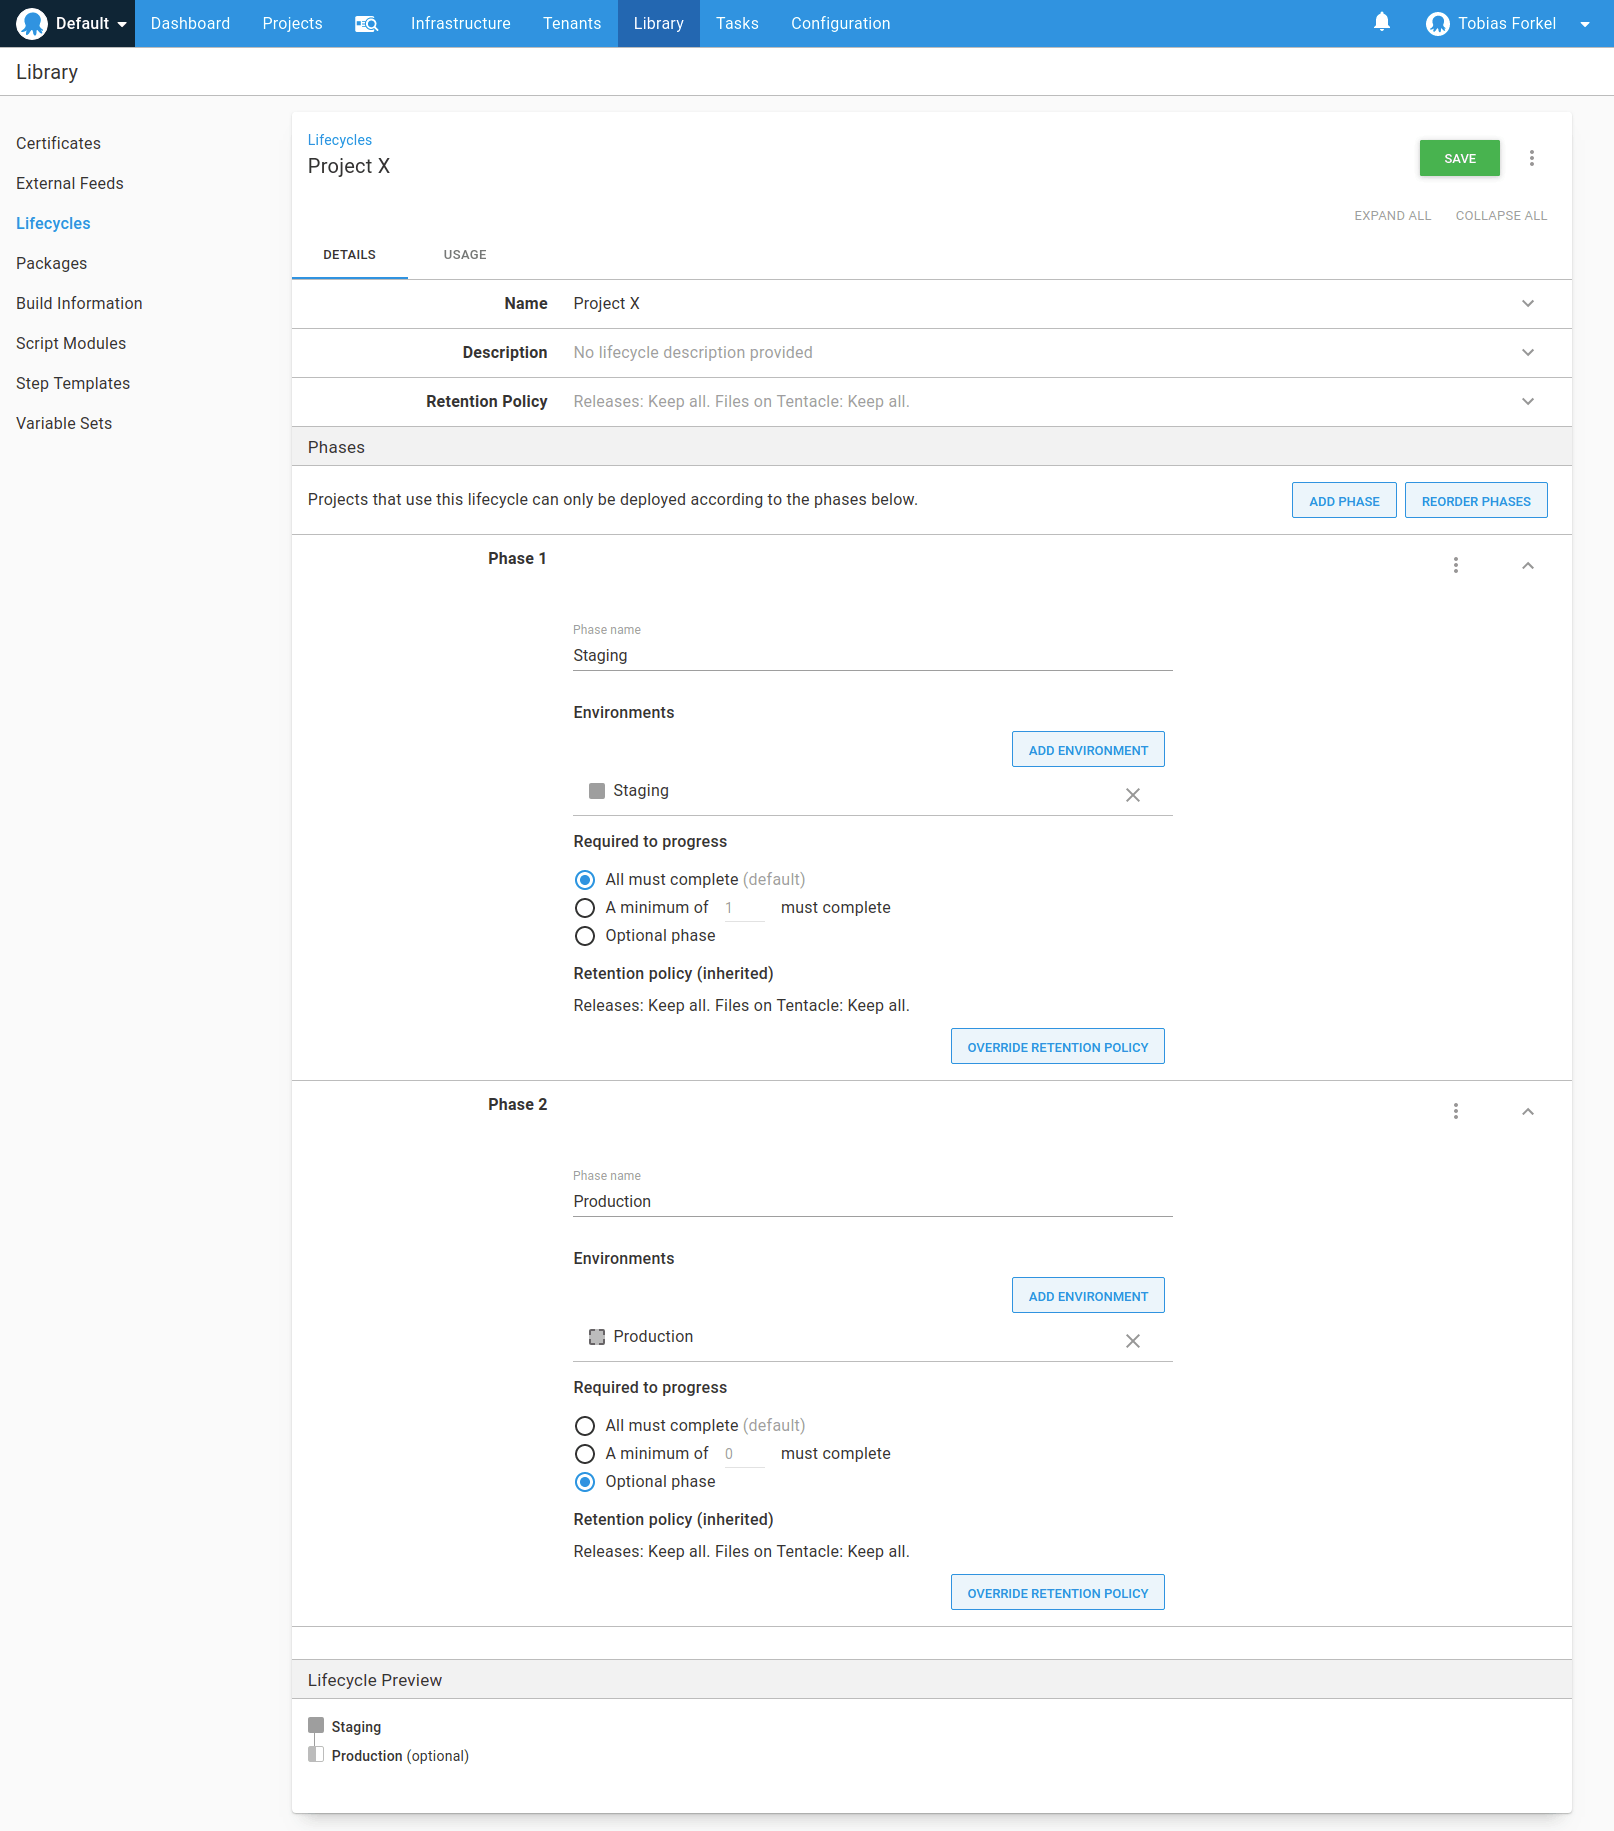
Okay, let’s start. Here is how you can create a custom Lifecycle.

  • From the Lifecycle page, click on the ADD LIFECYCLE button.
  • Give the Lifecycle a name and add a description. For example ” Project X “.
  • You can leave the Retention Policy unchanged ( Keep all ) for now.

Scroll down and continue with the next tab.

  • Click ADD PHASE, to explicitly define the phases of the lifecycle.
  • Give the phase a name. For example ” Staging ” because I want you deploy and review your changes on staging first.
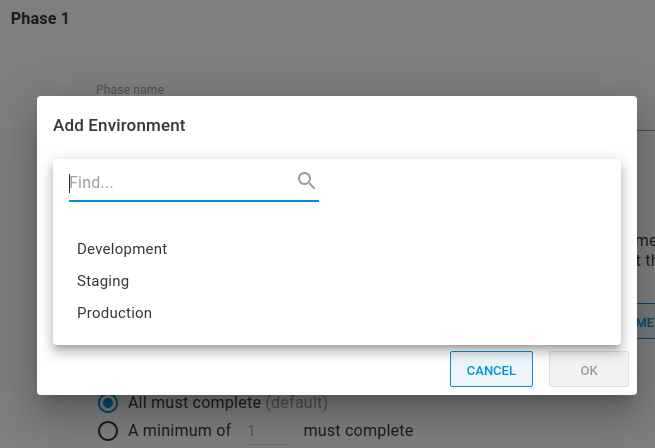
  • Click ADD ENVIRONMENT to define which environments can be deployed to during this phase of the lifecycle. Choose your staging environment from the dropdown list.

Octopus Select Environment

If you haven’t add an environment yet, you must create at least two ( staging, production ). Learn more about Environments.

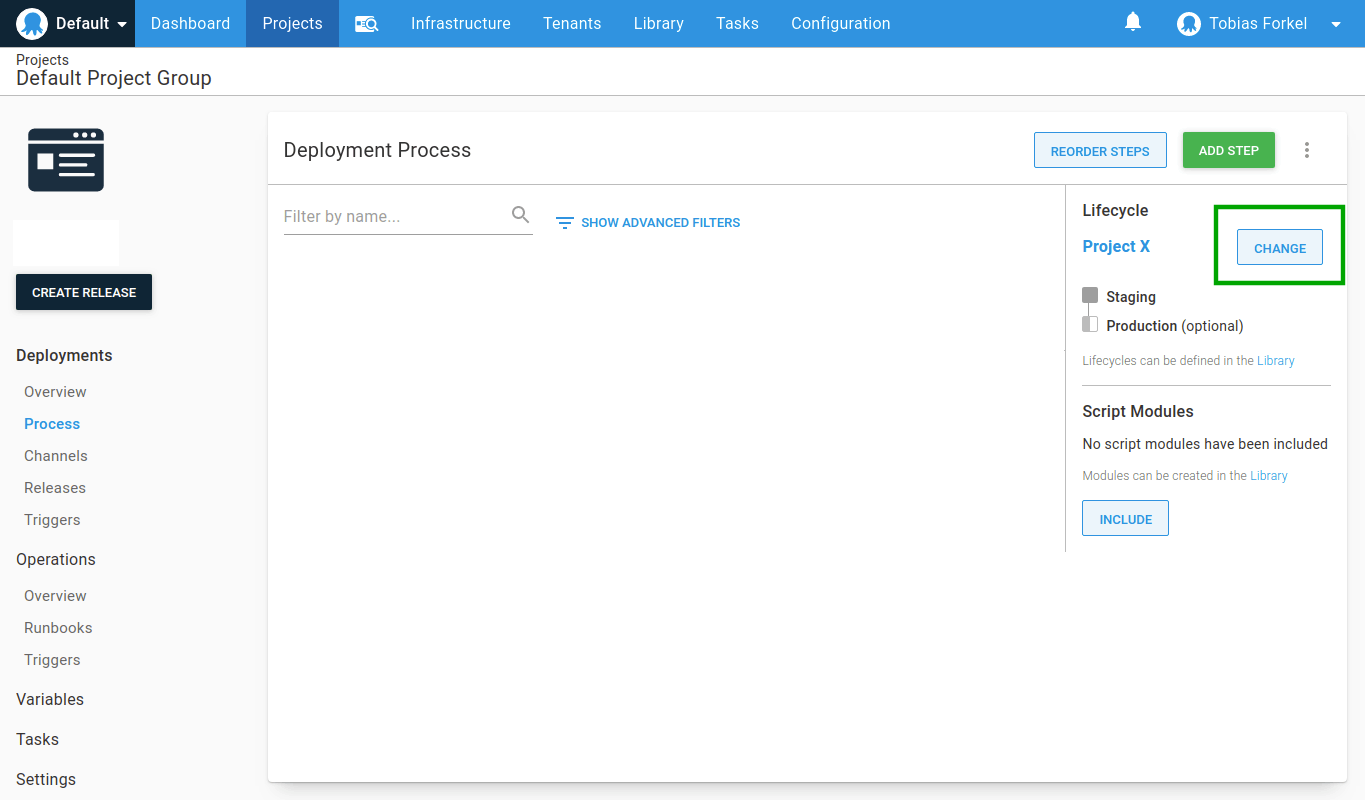
Scroll up again and save the new Lifecycle. Now go back to your project and click the link Process in the left sidebar. Next, hit the button Change on the right-hand side and select the Lifecycle that you’ve just created and save the changes.

Octopus Process Lifecycle

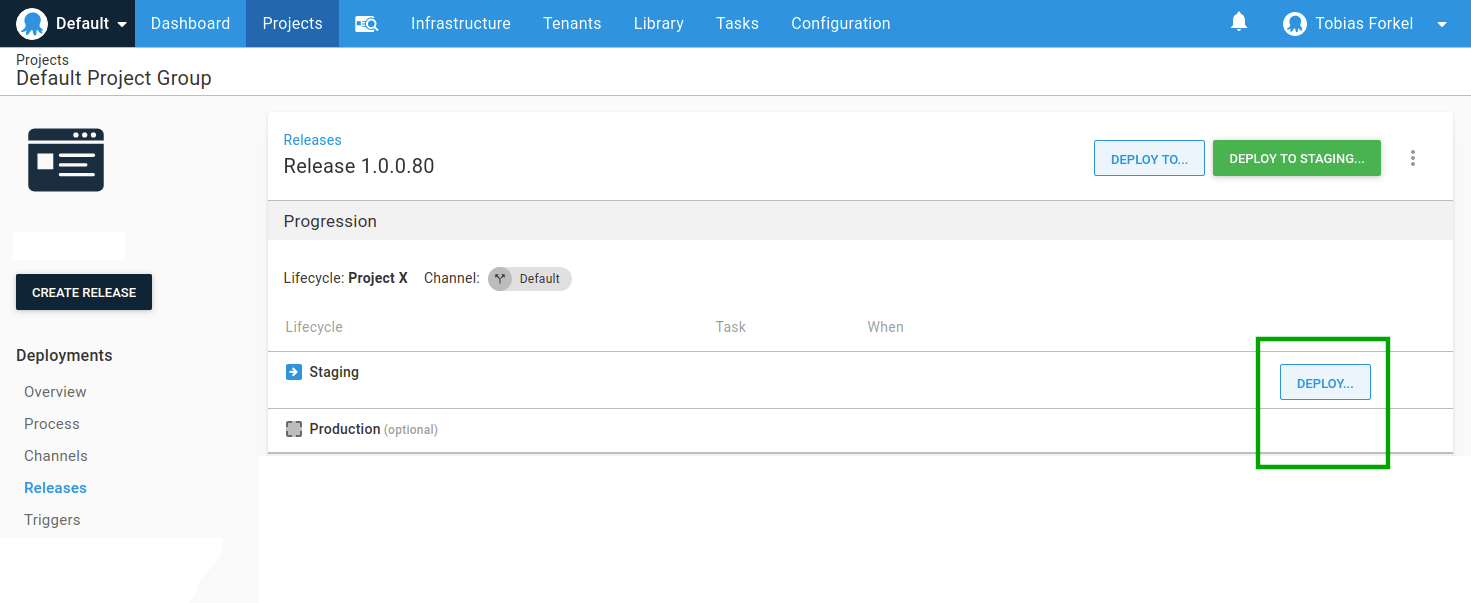
After that, try to deploy a new release. You will see that there is no option to deploy on production. Just must deploy your code successfully to your staging environment first in order to be able to push changes to production.

Octopus Deploy ReleaseThis is just one of many examples of how you can improve your deployment routine with Octopus.

Octopus – How to fix ” Missing deployment buttons “

Octopus Deploy

I saw a few comments on Stackoverflow where people ask how to setup or re-enable deployment buttons for staging or production. The answer is not quite straightforward, because you have to review a few things. Here is a quick checklist that may help you to identify the cause of missing deployment buttons.

1. Process

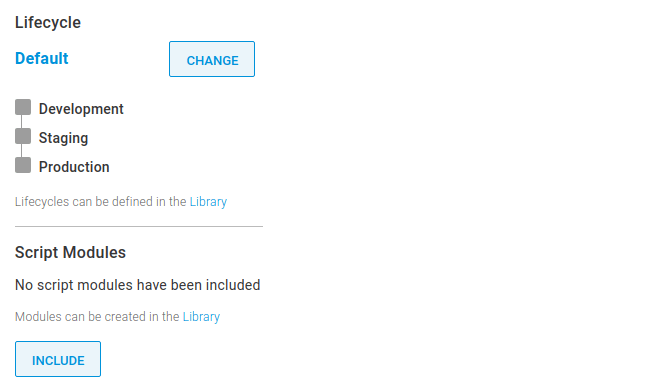
Make sure you have selected the right Lifecycle in Projects > Your Client > Deployments > Process.

Octopus Lifecycles Sidebar

2. Lifecycles

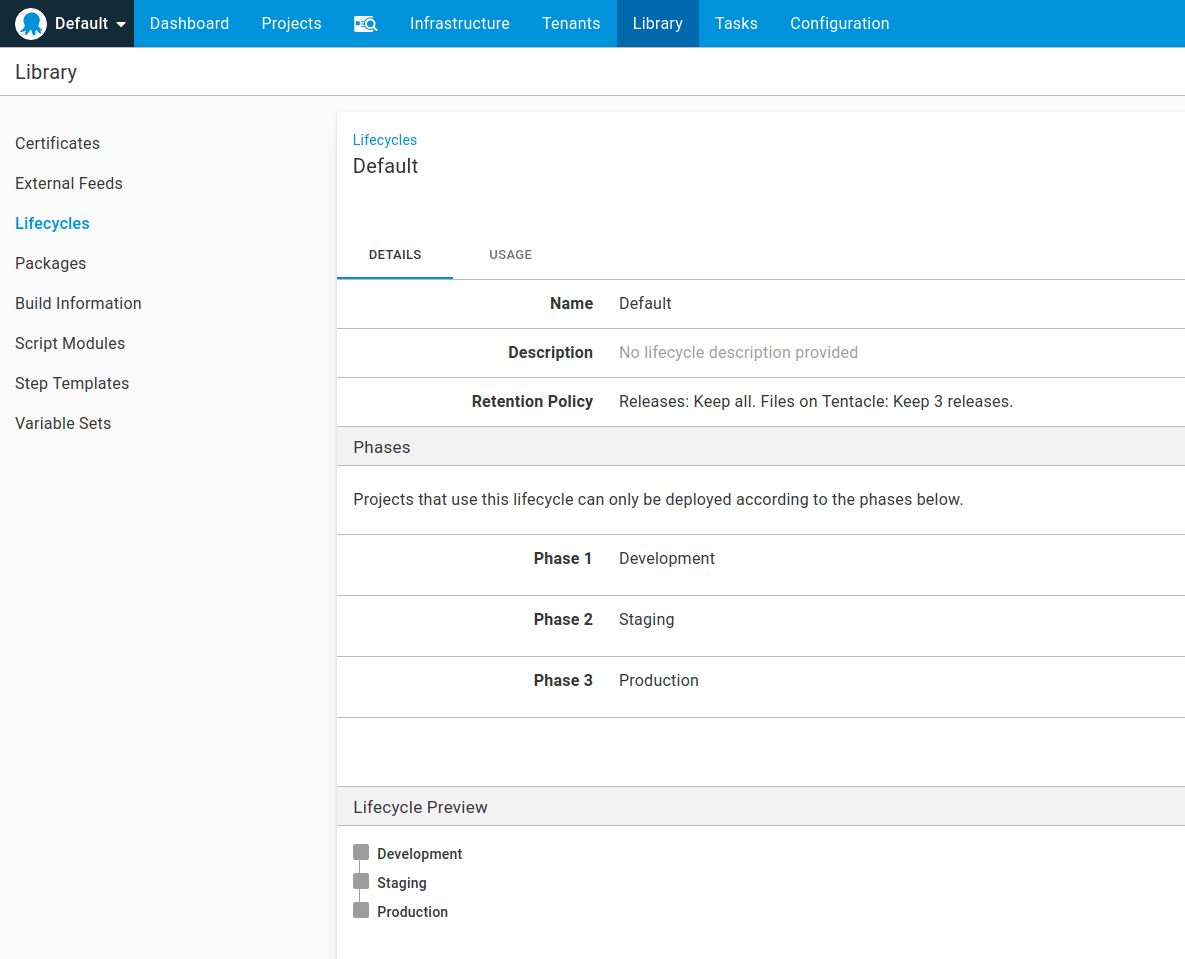
If you believe one Phase / Environment missing, go to Library > Lifecycles and try to add the missing environment in the Phases section.

Octopus Lifecycle Details

3. Environments

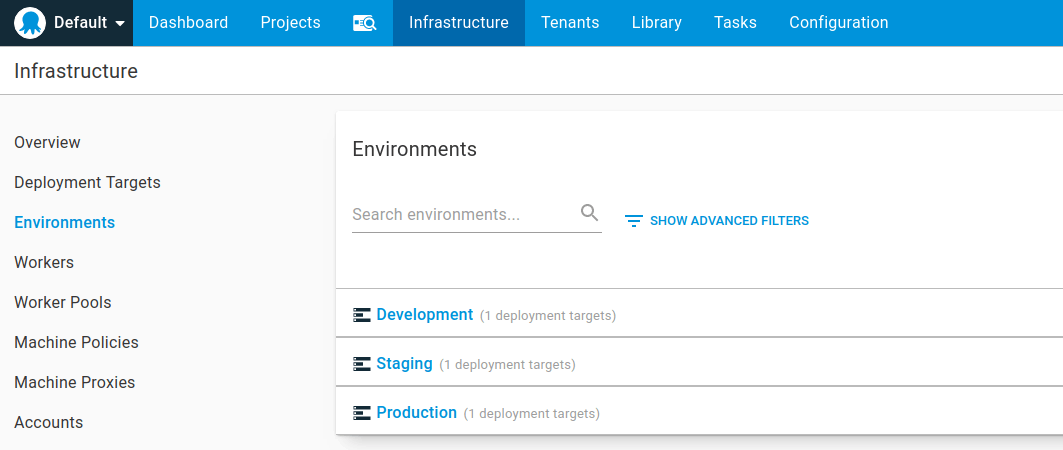
In order to be able to add a new phase, make sure all required environments are listed in Infrastructure > Environments.

Octopus Environments List

Learn more about Environments.

Octopus – How to fix ” There must be at least one enabled healthy machine to deploy “

Octopus Deploy

I am pretty new to Octopus and just started implementing a deployment process for a new PHP project. After creating a new machine in Infrastructure > Deployment Targets I went back to Projects > My Project > Create Release and tried to start a deployment to our dev environment which caused the following error.

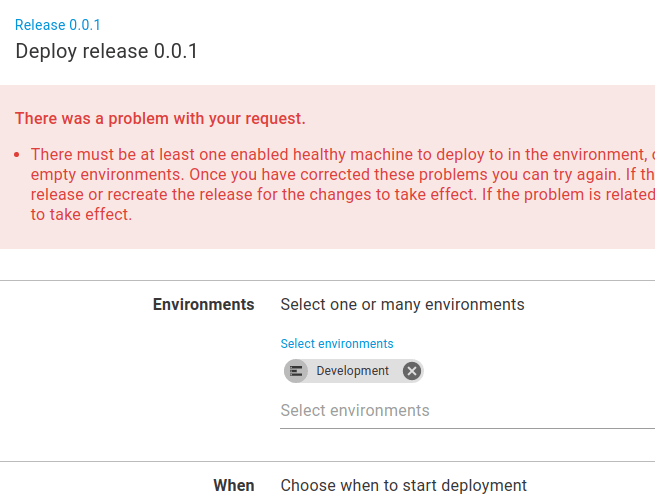
As you can see in the below screenshot, I tried to deploy a new release to the target Development.

Octopus Deploy Release Error Healty Machine

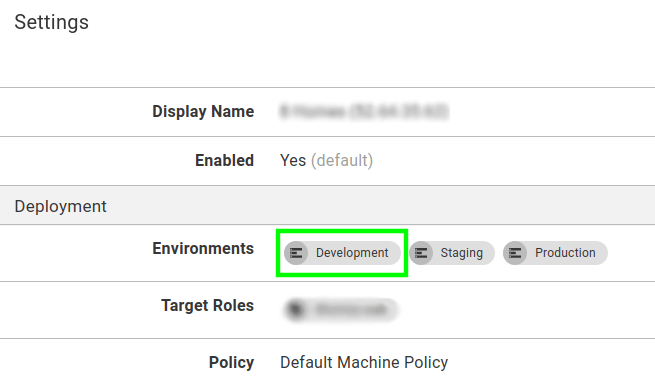
The error message was strange because the target status of my Deployment Target was flagged as healthy. After comparing the settings I noticed that the environment Development in my deployment target settings was simply missing.

Octopus Deployment Target Settings

After adding the target Development to the list of Environments, I was able to proceed with the above deployment.

Notice: Use of undefined constant T_CURLY_OPEN – assumed ‘T_CURLY_OPEN’ in /var/www/src/setup/src/ Magento/Setup/Module/ Di/Code/Reader/FileClassScanner.php on line 72

Today I finally had some time to cleaned up my Dockerfile for Magento 2. I am using Alpine Linux for most of my Magento 2 projects which usually includes NGINX, PHP-FPM and MariaDB.

While testing my updated Dockerfile I came across the following PHP notice which prevented the deployment scripts from finishing the Magento 2 setup.

The problem was simply a missing PHP extension php7.1-tokenizer which has resolved the issue after re-creating the container with –build.