Download Magento 1 Extensions after M1 EOL

Magento 1 Download Extension

Magento 1 extensions were removed from https://marketplace.magento.com about a month ago. According to Adobe’s recent blog posts, all extensions will be removed early August from their repository, which causes a lot of frustration on developers who are still in the middle of moving towards Magento 2 or simply need the code to translate it into Magento 2 modules.

Source: https://community.magento.com/t5/Magento-DevBlog/How-Extension-Developers-Can-Prepare-for-M1-End-of-Life/ba-p/446216

Source: https://magento.com/blog/magento-news/support-magento-1-software-ends-june-30-2020

So, in order to download an M1 package, you simply have to point to a specific URL. Luckily they didn’t turn off https://connect20.magentocommerce.com yet, but I believe Magento will get rid of it very soon.

I’ve spent a few minutes writing a ” quick and dirty ” PHP script that downloads the most recent version of each extension in https://connect20.magentocommerce.com/community/packages.xml including package details such as name, description, and author. For example https://connect20.magentocommerce.com/community/BankPayment/1.2.0/package.xml

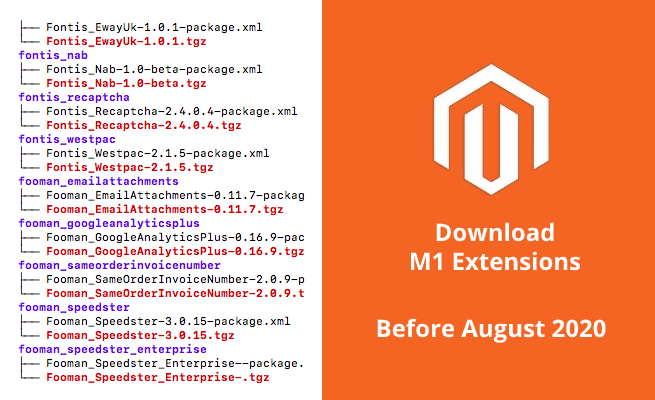
If you download all packages, you will end up with about 1300 extensions.

However, it seems the packages.xml file contains a lot of extensions that are actually not available anymore, that leads to a 404.

Another good resource is https://packages.firegento.com or http://freegento.com/ddl-magento-extension.php to download M1 extensions.

Feel free to change or share the code.

Octopus – Couldn’t find a valid ICU package installed on the system

Octopus Deploy

This morning I created a new ECS environment and tried to deploy a Laravel project on it.

So far so good, until one of the deployment steps got stuck in Octopus because of the following error.

While looking for a solution, I’ve noticed that I forgot to install the package libicu on the new ECS machine that was required during the deployment process.

After installing the missing package, I was able to deploy again without errors.

Magento 2.3.x – Unit Tests with ScopeConfigInterface

Magento2 Teaser

Imagine you have a helper class that is responsible for downloading and processing JSON files. This is something you don’t want to test manually all the time. I didn’t implement many unit tests in the past, simply because it wasn’t necessary or just not scoped in a project. However, there are cases where you actually save a lot of valuable time with just a few simple unit tests.

In this article I would like to show you how to inject store configurations ( ScopeConfigInterface ) to your mocked classes which are necessary to test multiple scenarios. In the following example I am going to test a helper class and make sure the following scenarios are working as expected.

  1. Is the module enabled in Stores > Configuration > General?
  2. Is a URL defined?
  3. Does the URL return a correct HTTP response?
  4. Is the downloaded content a valid JSON string?

Here is how my module looks like. I basically created a new helper Helper\Curl.php and a unit test file Test\Unit\Helper\CurlTest.php.

I’ve added some basic methods to the helper, such as isEnabled(), getFileUrl(), getStatusCode(), isJson() and downloadFile(). Nothing fancy, just a helper that can download a file.

Usually if you want to use system variables from core_config_data you have to inject the ScopeConfigInterface in your constructor. In unit tests it is quite similar. First, you have to create a mockup of the ScopeConfigInterface.

Next, you need a mockup of the Context, but this is not always the case.

Now you can inject these two mockups to the helper by using setConstructorArgs like in the below example.

Now you can define values for the scope configuration. This allows you to enable or disable your module or set random values and see how your code behaves. In the below example, I simply enable the module ( $isEnabled ) and set the file url ( $fileUrl ) to https://raw.githubusercontent.com/ljharb/json-file-plus/master/package.json which I will test with assertEquals and assertNotContains.

I also define an expected value for the CURL httpStatus and an expected return value of isJson(). Okay, lets run the test and see what happens.

All assertions within the test have succeeded. Let’s see what happens when I change the URL slightly. It should return a 404.

Yes, the test fails because I’ve received a status code 404 instead of 200.

That’s it. If you have questions or need help, please let me know in the comments.

Octopus – Basic ” Staging First ” Lifecycle

Octopus Deploy

In this post, I am going to show you how to prevent a release from being deployed directly to production if it hasn’t been deployed to staging. Octopus has a great feature called ( Lifecycles ) that allows you to create advanced deployment workflows for any type of project.

Octopus Lifecycles Example

This way you are able to force your team to follow a strict deployment process that will definitely improve your test routine and the way how you deploy code changes. No more untested code changes on production!

Okay, let’s start. Here is how you can create a custom Lifecycle.

  • From the Lifecycle page, click on the ADD LIFECYCLE button.
  • Give the Lifecycle a name and add a description. For example ” Project X “.
  • You can leave the Retention Policy unchanged ( Keep all ) for now.

Scroll down and continue with the next tab.

  • Click ADD PHASE, to explicitly define the phases of the lifecycle.
  • Give the phase a name. For example ” Staging ” because I want you deploy and review your changes on staging first.
  • Click ADD ENVIRONMENT to define which environments can be deployed to during this phase of the lifecycle. Choose your staging environment from the dropdown list.

Octopus Select Environment

If you haven’t add an environment yet, you must create at least two ( staging, production ). Learn more about Environments.

Scroll up again and save the new Lifecycle. Now go back to your project and click the link Process in the left sidebar. Next, hit the button Change on the right-hand side and select the Lifecycle that you’ve just created and save the changes.

Octopus Process Lifecycle

After that, try to deploy a new release. You will see that there is no option to deploy on production. Just must deploy your code successfully to your staging environment first in order to be able to push changes to production.

Octopus Deploy ReleaseThis is just one of many examples of how you can improve your deployment routine with Octopus.

Octopus – How to fix ” Missing deployment buttons “

Octopus Deploy

I saw a few comments on Stackoverflow where people ask how to setup or re-enable deployment buttons for staging or production. The answer is not quite straightforward, because you have to review a few things. Here is a quick checklist that may help you to identify the cause of missing deployment buttons.

1. Process

Make sure you have selected the right Lifecycle in Projects > Your Client > Deployments > Process.

Octopus Lifecycles Sidebar

2. Lifecycles

If you believe one Phase / Environment missing, go to Library > Lifecycles and try to add the missing environment in the Phases section.

Octopus Lifecycle Details

3. Environments

In order to be able to add a new phase, make sure all required environments are listed in Infrastructure > Environments.

Octopus Environments List

Learn more about Environments.

October CMS – Execute Console Commands Sequentially

October CMS Logo

In this tutorial, I am going to show you how to execute long running PHP processes sequentially in October CMS from anywhere of your code.

First, you must define a default driver, which is pretty much a handler for managing how to run a queued job, identifying whether the jobs succeeded or failed, and trying the job again. In October CMS, the driver settings are located in the file in ./config/queue.php.

If you are new to this, I recommend to start with the database driver. This driver is good enough to execute your console commands synchronously in the background without slowing down your PHP calls. As a next step, you have to register a custom console command in your Plugin.php file. For example company.pluginname.

For test purposes, I created a console command company.pluginname which will execute the method backupList.

Let’s assume you have a front-end controller http://yourpage.dev/customer/list that calls an API, creates a list and saves it on disk. Executing all these steps can be time-consuming and simply slow down your controller. Instead, you can run such processes in the background with Artisan::queue.

As soon as you hit the controller, artisan will queue a new record in the table jobs and wait until a queue worker executes the job. You just have to make sure that a Queue Worker is running in the background, otherwise jobs won’t get executed.

I recommend to start a queue worker with Supervisor which is well explained on https://medium.com/@rohit_shirke/configuring-supervisor-for-laravel-queues-81e555e550c6


October CMS – How To Use Models In Custom Components

October CMS Logo

Components in October CMS can be used for custom output, such as JavaScript snippets, dynamic content from a web service or models. Components can also handle AJAX requests or other incoming data. In this tutorial, I will simply show you how to register a new component and output a list with records from the users table.

First of all, you have to register a new component in your Plugin.php file. For example, users.

Create the following structure within the components folder which must contain the file Users.php and users/default.htm.

Below you will find the content for the default.htm file which will basically output a list of all users.

The Users.php file only requires a method getPeople and a reference to the new model, called UsersModel.

In order to access a model, you must create one within the models folder.

For test purposes, I simply return all records from the users table.

Now you can use the new component anywhere in your template files. I recommend to use [users] in your parent template file, because it will allow you to use the component in your child templates.

After a page reload, should you immediately see the list.

October Cms Custom Component

For more information, check out https://octobercms.com/docs/cms/components. The source code of this tutorial can be found on https://github.com/tobias-forkel/october-cms-playground

Octopus – How to fix ” There must be at least one enabled healthy machine to deploy “

Octopus Deploy

I am pretty new to Octopus and just started implementing a deployment process for a new PHP project. After creating a new machine in Infrastructure > Deployment Targets I went back to Projects > My Project > Create Release and tried to start a deployment to our dev environment which caused the following error.

As you can see in the below screenshot, I tried to deploy a new release to the target Development.

Octopus Deploy Release Error Healty Machine

The error message was strange because the target status of my Deployment Target was flagged as healthy. After comparing the settings I noticed that the environment Development in my deployment target settings was simply missing.

Octopus Deployment Target Settings

After adding the target Development to the list of Environments, I was able to proceed with the above deployment.

October CMS – Add Menu Item And Store Backend Settings

October CMS Logo

At some point you probably want to make your custom plugin for October CMS configurable and allow backend users to make changes within the plugin space. October CMS has a simple and intuitive backend navigation, which you can easily extend in no-time. Let’s assume you have a custom plugin that calls an external API. Here is how you can store API credentials by using the Settings Manager.

First of all, you must register the settings in your Plugin.php file.

After that you must create a Settings.php file with the following content inside your models folder.

If you define default values inside the method initSettingsData, make sure the above fields match with the definitions inside the fields.yaml file.

Once the fields.yaml file is created, you should see a new form within the new tab.october_cms_playground_sandbox_backend_system_item

Now you can access the settings values within your controller, console or component by implementing the following model.

For test purposes, I created a new controller and implemented the above model to get access to the API key.

Here you go.

october_cms_playground_sandbox_frontend_output

The entire source code can be found on https://github.com/tobias-forkel/october-cms-playground.

Laravel – Carbon and Queries

Laravel

Carbon is probably the most effective way to handle DateTime strings flawlessly and implement PHP code that everybody can easily extend or debug.

In the following example, I would like to demonstrate how you can filter a collection in Laravel by using Carbon. As you can see, the below example will simply return all People who have registered in the past two weeks.

The method subWeeks() will do all the work for you and return a valid DateTime string from 14 days ago which can be used for the whereBetween query method. If you prefer using days, you can simply use subDays() instead.

One possible use case could be a front-end controller that handles AJAX requests.