Use TIMESTAMPDIFF to identify long running cronjobs in Magento2

magento2_teaser_patch

Improving performance in cron jobs can be very time consuming. Even just figuring out where to start can take hours.

I came up with an idea that really helped me to locate potential performance killer just by checking the execution time by using TIMESTAMPDIFF. For example:

Output example:

The runtime can be a sign of high memory or CPU usage, therefore, you should probably look at those cron jobs first.

Warning: array_replace_recursive(): in Setup/Declaration/Schema/Diff/Diff.php

Magento2 Teaser

Today I’ve noticed an error during a test deployment that occurred right after setup:upgrade. Unfortunately it didn’t indicate the affected module.

I took a quick look at the recent changes and noticed a syntax error in db_schema_whitelist.json file. In this particular case it was a comma that shouldn’t be there.

Easy fix!

Before:

After:

After removing the comma, the deployment ran through gain.

Apply patches with composers post-install-cmd

magento2_teaser_patch

I just want to introduce another approach that will apply Magento patches, in case your Magento instance isn’t hosted on Adobe’s Cloud infrastructure or can’t be applied as explained in How to apply a composer patch provided by Adobe for some reason.

1. Update your composer.json file

Add a new section scripts” at the end of your composer.json file and validate your file with composer validate.

If you see ./composer.json is valid you are good to move on. Btw. your composer.lock file doesn’t need to be updated.

2. Create a folder ./patches/

Create a folder ./patches/ or something similar and copy your *.patch file in there.

3. Test it

Run composer install and wait. Your script and patch should be executed after Generating autoload files just like in the below output.

4. Deploy it

Commit your changes ( composer.json and ./patches/ ) folder and run your deployment procedure.

That’s it!

Adobe APSB22-12 – Don’t panic!

magento2_teaser_patch

Adobe has released a critical security patch early this week on https://support.magento.com/hc/en-us/articles/4426353041293-Security-updates-available-for-Adobe-Commerce-APSB22-12– and https://helpx.adobe.com/security/products/magento/apsb22-12.html.

Of course, Adobe Commerce merchants and agencies are nervous and want to apply the security patch as soon as possible. However, I believe as long as your admin passwords are strong enough and you have control about your admin accounts, you shouldn’t be worried too much.

Here is why.

Let’s have a look at the content of the security patch.

The patch will update two files only that are responsible to process template variables such as email variables {{var logo_url}} or {{config path=”general/store_information/name”}} or variables within CMS pages or Static Blocks. The change is trivial and will wipe out unwanted content by using the pattern $pattern = ‘/{{.*?}}/’.

It basically means, in order to be able to exploit this issue, you must:

1. Know the admin url of a store
2. Have access to the Magento backend ( ideally admin privileges )
3. Know how to exploit the issue

So, as long as you maintain admin accounts regularly and know who is actively working in your backend, you should be fine.

However, if you have modules installed that add custom variables by injecting Magento\Email\Model\Template\Filter in combination with 3rd party services, you should probably go and install the patch with your next release.

Update: 2022/02/16

Code could possibly injected by using the customers billing or shipping address ( e.g {{trans “%name,” name=$order.getBillingAddress().getName()}} ) depending on how strong form validation is in the front-end ( My Account > Addresses or Checkout ).

Magento 2 – How to fix ” The order confirmation email is not sent “

Magento2 Teaser

This morning I was working on an email issue ( multi-store ) where customers were able to purchase but didn’t receive the order confirmation email.

As always, I had a look at what has been deployed recently and checked pretty much all logs on the production environment. Unfortunately, I couldn’t find anything.

I started looking at database changes, especially the core_config_data table, and noticed that the template for the order confirmation was defined twice. This was kind of weird because those email settings were set to ” Use System Value “.

I ended up deleting the IDs 4293, 4296, 4299 which has fixed the issue immediately. I still don’t know why those values were set twice, but I hope this will help someone…sometime.

Magento Cloud – sendmail: /etc/msmtprc: line 6: command host needs an argument

Magento2 Teaser

This morning I ran a deployment on a fresh Magento Cloud environment and suddenly got the below SMTP error right after setup:upgrade, which was very unusual.

I had a look at the recent changes and found a mail() function in the modules InstallSchema.php script.

In this particular case, a 3rd party module developer has implemented a tracking system to notify his agency about new module installations. It may work on some hosting platforms, but obviously not on Magento Cloud during the build process.

Magento 2.4.x, Elastic Search 7.9.1 on Alpine Linux 3.12, jdk/bin/java: No such file or directory

Magento2 Teaser

While setting up a new local test environment specifically for Magento 2.4.x with Elastic Search on Alpine Linux ( Docker ) I had some problems with getting elastic search up and running.

The first issue I had was related to a missing home path of JAVA. Because of that, I wasn’t able to start Elastic Search at all.

I’ve fixed it by setting the missing path for JAVA_HOME which I have added later to my profile settings. https://stackoverflow.com/questions/35325856/where-to-set-system-default-environment-variables-in-alpine-linux

The second issue was related to the JAVA version inside the docker container.

Alpine Linux has the required version in the repository, which made it easy to install the missing package with apk.

GCE – Open Up Port 8025 in VPC for MailHog

google_cloud_plattform

If you want to use MailHog ( https://github.com/mailhog/MailHog ) on your Google Compute Engines (GCE) you probably have to create a new VPC firewall rule in your project. In this post, I will skip the installation and configuration part of MailHog with Supervisord, because there are so many different ways to set up MailHog.

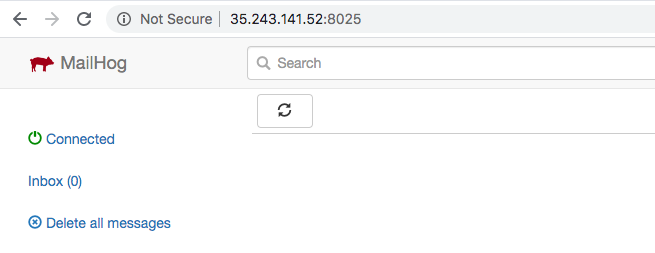
By default, the MailHog interface is running on port 8025.

Mailhog GUI interface

Once the MailHog process is up and running, you probably won’t be able to access your server on port 8025. This is because those ports are not defined in VPC. In order to get access from outside, you must create a new firewall rule in your GCE project. This can be done in the Google console or simply via the command-line. Here is how I created a new rule ” custom-allow-mailhog ” for port 8025.

Once the rule has been created, you should be able to open the interface of MailHog.

GCE – SSH Directly Into Your Docker Container

google_cloud_plattform

In this article, I am going to change the SSH port from 22 to 52241 and create a new firewall rule in VPC. Please do your own research and make sure you understand the impact, especially on a production environment.

When you deploy a new docker container on GCE, you can SSH into the host machine ( VM ). This is simply because the IP address is pointing to the host machine. But what about the docker container that runs on it? In this case, you must use docker exec or the gcloud command-line tool in order to get access to the container, which can be pretty time consuming over time.

I am working on a project where I need direct access to my alpine docker container on port 22 or any other port. As you can see in the below output, no ports are exposed for my container.

This is mainly because the docker container shares the network with the host. Source

Containerized VMs launch containers with the network set to host mode. A container shares the host network stack, and all interfaces from the host are available to the container.

This is very convenient because it allows you to access your docker container from pretty much any port. However, only a few ports are actually open and configured in the VPC Network > Firewall settings for security reasons. For the SSH connection I decided to open a custom port 52241. You can do this in your GCP Console under VPC Network > Firewall or with the following gcloud command-line tool.

Once completed, here is how the new firewall rule looks like in the console. If you scroll down, you will also see all affected instances.
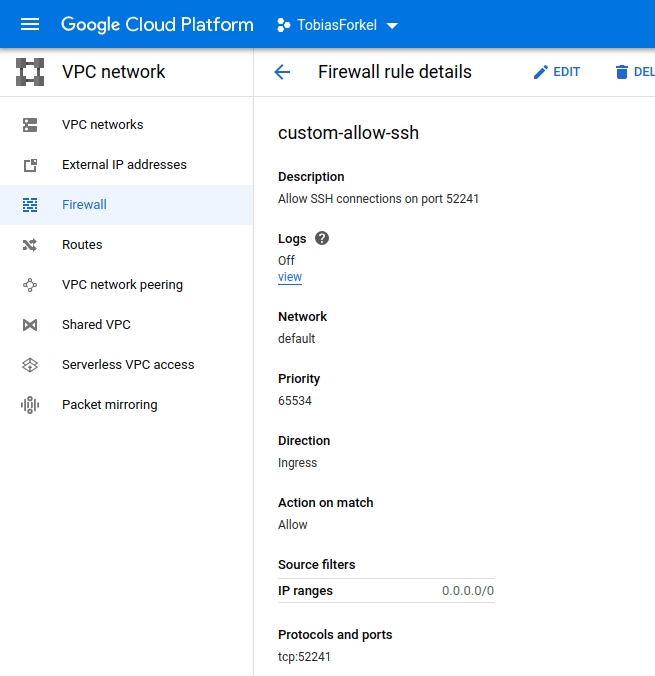
GCP Custom Firewall

Before you can SSH into your container on port 52241 you must change the port in the sshd configuration /etc/ssh/sshd_config within your container or container image. Not on the VM.

You may have to restart your ssh service before you can use the new port. Once this is done, you can SSH into your docker container.

AWS – ECS Keeps Recreating Docker Container

AWS ECS Logo

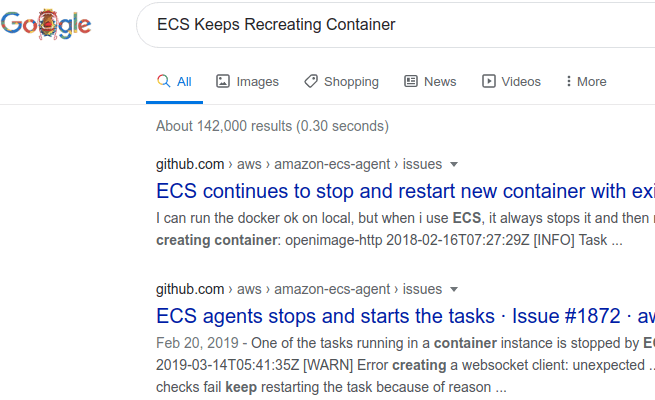
Today was a strange day. I’ve launched a new version of my docker image within an ECS cluster, which usually worked fine. However, today my container always got recreated every 5 minutes for no reason.

ecs_keeps_recreating_containers

The new docker image that I have pushed to the repository had no significant changes, except a redirect from non-SSL ( 80 ) to SSL ( 443 ) for all loaded virtual hosts. So, when I had a look at the processes, everything looked fine. There was nothing that could put the container into an unhealthy status.

Even the log output of the docker container didn’t show any error. After a little bit of research, I ended up on the following AWS developer guide page https://docs.aws.amazon.com/AmazonECS/latest/developerguide/update-service.html

It was not exactly what I was looking for, but it pretty much explained the problem I had. One of my colleagues said I should maybe have a look at the health checks of the load balancer.

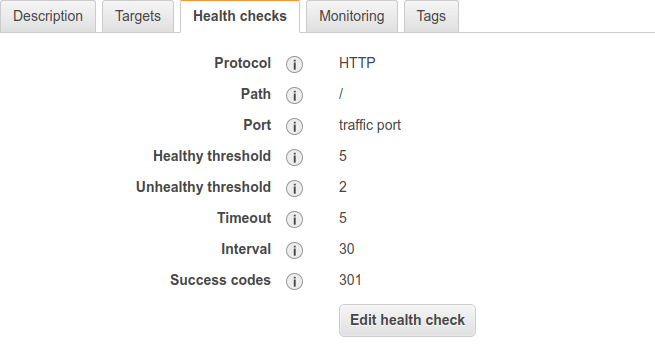
Indeed, when I had a look at the settings in EC2 > Load Balancing > Target Groups > Health Checks the health check expected a success code 200 instead of 301 on port 80. Because of that, the container has been marked unhealthy every 5 minutes.

aws_ec2_load_balancer_health_checks

I hope this will point someone in the right direction.